
How to Edit a Live Squarespace Website Without Breaking It

Does the thought of making live edits to your Squarespace website make you panic that the world will see your half-finished updates?
In this blog I’ll talk through several different strategies that you can use while editing your Squarespace website to ensure your edits remain private until you’re ready for them to go live.
From whether you’re making quick and simple edits, or plan to totally overhaul your website, one of these methods will be the right one for you.
Quick jump to the methods below:
Method One: A ‘Coming Soon’ Lock Screen
This method totally hides your website content behind a password protected Lock Screen, allowing you to work in secret.
It requires a quick bit of upfront work to create a Lock Screen, usually explaining why the website is gone and how users can get in touch with you otherwise.
Let’s take a step back here: what is a Lock Screen?
On Squarespace, a Lock Screen in a built-in function which allows you to hide all, or specific pages, of your website behind a single, password-protected page.
Anyone who doesn’t have the password can’t get any further than that page.
You can create a Lock Screen in Squarespace with no coding knowledge, however do note that you can only have one Lock Screen design for all pages. It cannot be customised per page.
Lock Screens also come in specific, pre-designed layouts which can be customised in specific ways, but you cannot add blocks or build your own from scratch.
Okay so, how do we do it?
Step One: Set up your Lock Screen
Log in to Squarespace and click on the website you’re looking to edit.
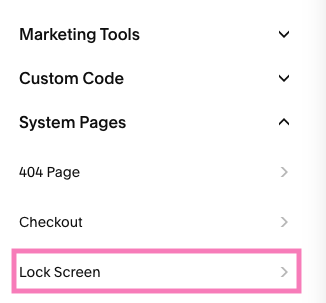
Then click ‘Pages’ so you can see your website’s Main Navigation and scroll down to ‘System Pages’ and click ‘Lock Screen’.
Now you can customise the Lock Screen as much or as little as you like:
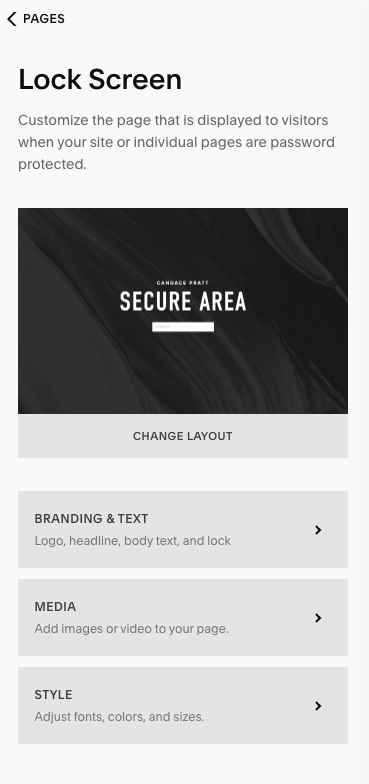
Choose a different layout: some have more options for customisation than others, so pick whichever is right for you.
Add Branding & Text: here you can add your Brand logo, and in the ‘Headline’ or ‘Body’ text sections consider giving some context as to why your website is currently unavailable and when you expect it to be back up and running.
Toggle the lock icon on or off
Add a photo or a video: using one image as the background of your landing page can be very impactful, but it can also make your text tricky to read. Alternatively you can not add any media and keep it plain.
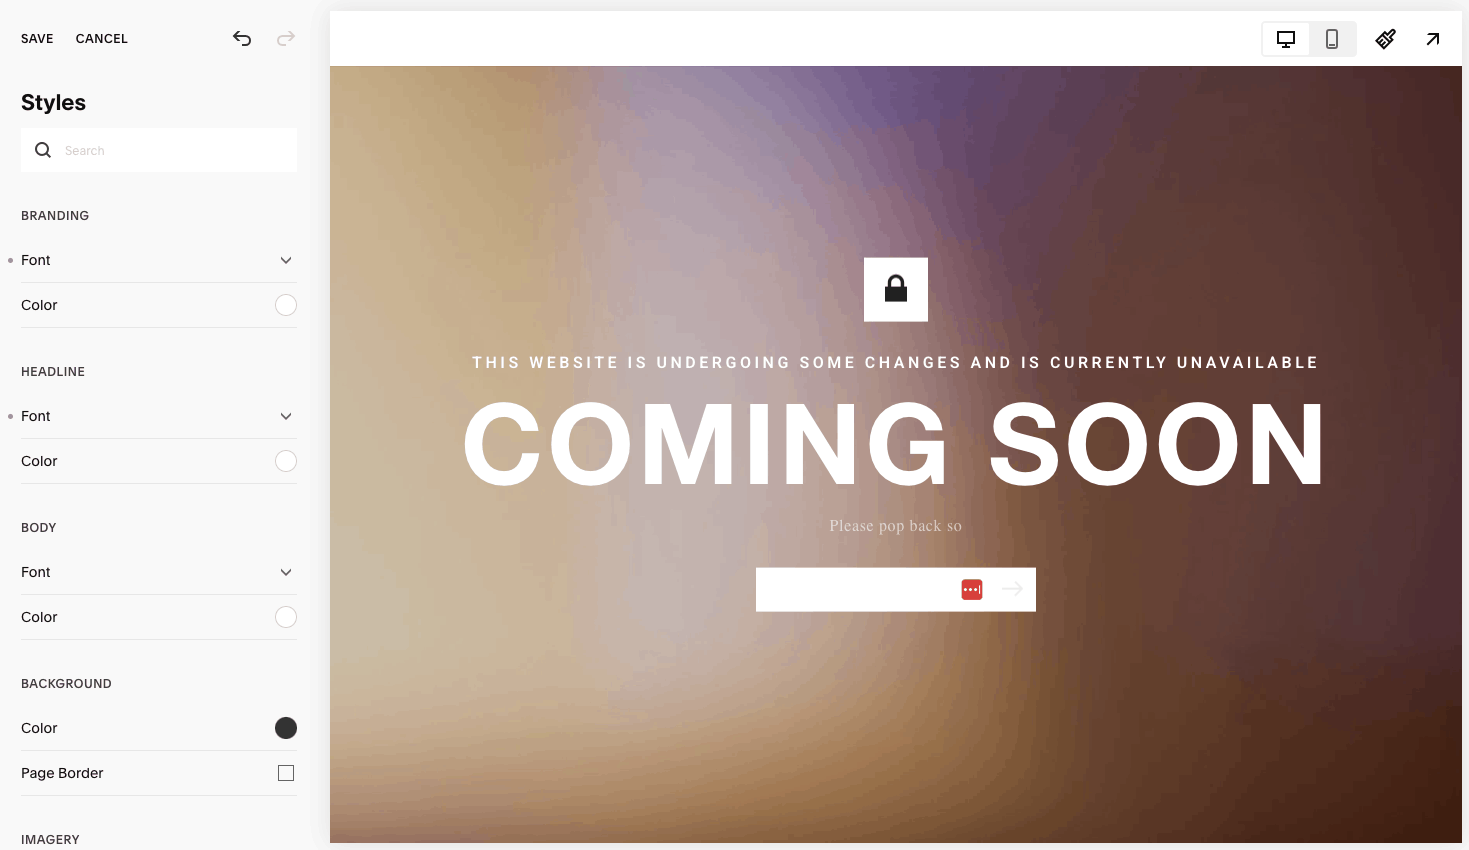
Adjust the style: you can customise how your lock screen looks such as the colours, size of the lock (if visible), and change the appearance of several elements of the Lock Screen.
Step Two: Set your Locked Screen live
Now, navigate back to the Pages section of your Squarespace website and click on whichever page is set as your ‘Homepage’.
Hover over the page name and click the gear icon that appears to the right.
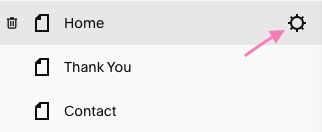
Navigate to the ‘Password’ box.
Now add whatever password you’d like to give your website.
Don’t forget to click ‘Save’ in the top left corner.
You’re done: your website is now hidden behind a password protected Lock Screen.
What are the pros and cons of using a Lock Screen?
Pros:
It’s easy: it’s a built-in Squarespace function with no need to code
You’ll be certain that no one can see your funky edits while they’re going on
It’s very simple to turn off again (just delete the password from your homepage and it’s back up and running!)
Cons:
Design-wise you’re limited to Squarespace’s built-in layouts
It will involve some time to set up and customise the Lock Screen, and add to your overall website editing time
If you password protect your whole website it means none of your website content will be available. Expect your bounce rate to increase and to see a reduction in your website traffic overall due to the removal of your content.
Overall adding a Lock Screen to your whole website is a pretty disruptive way to make edits to a live Squarespace site.
I generally wouldn’t really recommend this method as you’ll see your SEO tank, your bounce rate go through the roof.
It’s also quite a frustrating from the point-of-view of the user.
If I go to a website to find out more information, I would prefer to see out-of-date information, or a website that is undergoing some funky edits, than to be totally locked out of it.
Method Two: Duplicate the page you're editing
If hiding your whole website behind a Lock Screen isn’t for you, and you want to keep your website live while you make edits, this is a method to consider.
Essentially this method sees you duplicating the page you’re looking to edit, making the edit in secret, and then swapping the new page and the old page.
One thing to note is that not all Squarespace pages can be duplicated.
If you’re looking at overhauling how your Blogs, Portfolio, or Course page looks, unfortunately these cannot be duplicated.
If you’re looking to edit a page which can be duplicated, here’s how:
Step One: Create the Duplicate
In your website’s Main Navigation, find the page you want to work on.
Click the cog on the right, which will open the Page Settings.
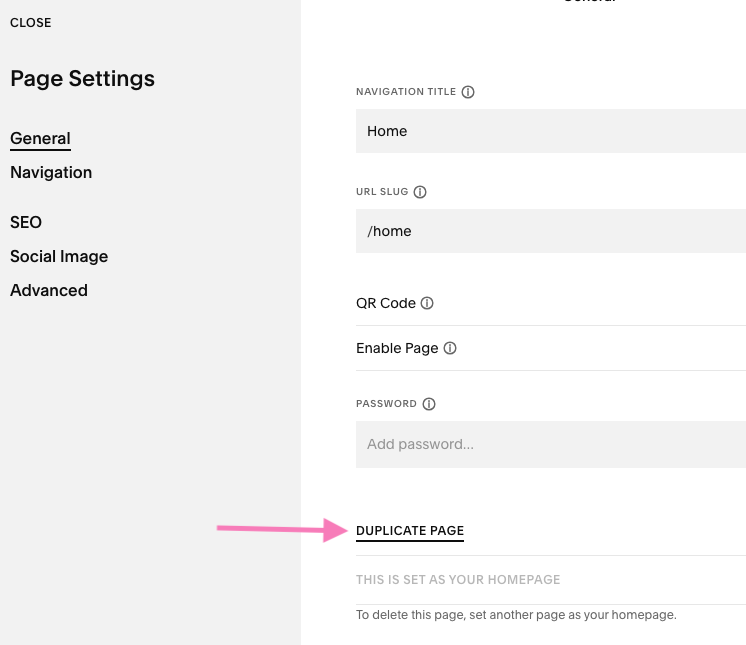
Scroll down and click ‘Duplicate Page’.
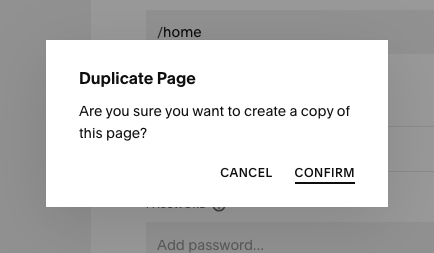
Squarespace will now create a duplication of the website in the ‘Not Linked’ section.
To help you differentiate, the new version will also have “(copy)” added to the end of its title.
Step Two: Make your edits
Do what you need to do.
Just make sure you’re doing them to the (copy) and not the original live version, as that would defeat the point of all this…!
Step Three: Make the switch
One you’re ready to get the new page live, we need to make the switch.
The important thing to remember here is that every page on your website must have a unique URL.
So, in order to get your new page live, we’re essentially going to swap the URLs.
Navigate to the Page Settings for the old version of the page that you’re going to take down.
Find the ‘URL Slug’ section and change this; e.g. you could add ‘-old’ to the end of the existing URL.
Then don’t forget to click save.

If the page you have been editing is in your ‘Main Navigation’ you should also click and drag it down into the ‘Not Linked’ section.
Now find your ‘new’ page, i.e. the ‘(copy)’.
Head into the Page Settings and change the URL Slug to what you want it to be.
Usually this is simply removing the ‘-1’ that Squarespace automatically added during the duplication process.
Also don’t forget to remove the ‘(copy)’ from the Page Title and Navigation Title sections, as you don’t want this to be visible on your live website.
Finally click and drag this page up from the ‘Not Linked’ section to the ‘Main Navigation’.
And now you’re done. That was quick, wasn’t it?
If you’re happy, you can go ahead and delete the old version from your ‘Not Linked’ section.
What are the pros and cons of duplicating an individual page?
Pros:
Your website can stay live while you make your edits
It’s quick; the page you’re editing will only be down for a few seconds
Cons:
It can be easy to accidentally edit the live page rather than the copy (oops!)
Not all page types can be duplicated in Squarespace
If you’re changing your whole website, it can be difficult to keep on top of which page is which.
Overall this is a great way to edit a live Squarespace website.
The website remains live, which is great from both a user experience point-of-view and also your SEO.
The switch over is quick and simple, if a little fiddley.
Method Three: Duplicate the whole website
Planning a total website overhaul, or pivoting your business to something else?
If doing it page-by-page is not for you and you want to totally start afresh, this option might be for you.
Duplicating the whole website is easier than it sounds.
And, even better, you don’t need to pay for a Squarespace subscription for the new website until you set it to public, so just be sure to edit your duplicated website in private.
Some quick caveats:
In order to duplicate a Squarespace website you must be an admin of the site.
You can’t duplicate a website with more than 100 pages.
Not all things can be duplicated, and in the process you may lose things such as specific fonts, blog comments, items in your asset library etc.
If you’re ready to start afresh, here’s how you duplicate a Squarespace website.
Step One: Duplicate the website
Head into your Squarespace Account Dashboard (https://account.squarespace.com), where you can see all the websites associated with your account.

Click the three dots (…) next to the website you want to duplicate, and click ‘Duplicate website’.
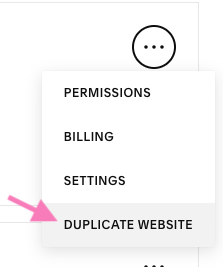
Your new website will appear in your account with (copy) added to the end of the title.
And now you can get to editing!
Your existing website will stay live while your new website can be edited without anyone seeing.
Then, once you’re ready to make the switch you set the new website to public and switch your domain over to it too.
How does it work with subscriptions?
You cannot transfer your existing Squarespace subscription to your newly duplicated website.
You will need to create a new subscription, and you will not be able to transfer over any legacy pricing you might have.
What about Domains?
Your newly duplicated website will not automatically have your custom domain associated with it.
In the duplication process Squarespace will have created a new string of random words as a ‘built-in domain’.
When you’re ready to go live with your newly designed website, you will need to set your duplicated website live and transfer the domain across.
And don’t forget to set your old website to private and cancel the subscription there.
What are the pros and cons of duplicating the whole website?
Pros:
If you’re planning big changes and don’t want to deal with the clutter of your old website.
A fresh start from your old website.
Duplicating the whole site is easily done in a few clicks.
Cons:
Transferring across domains and buying new subscription packages might be fiddly or costly.
You may lose elements of your old website that you wish to preserve (e.g. blog comments).
If you’re on a legacy pricing plan that Squarespace no longer offers, you will not be able to continue with it on your new website
You only get 2 weeks to edit the trial website (but you can ask Squarespace for an additional week via their support chat) so you’ll need to work swiftly.
This is a good option if you’re looking to do a total redesign of your website, but make sure you fully understand any subscription price changes before you go ahead and commit.
Method Four: Just going for it
You’ve got some small edits or additions to make to your existing website?
Sometimes you’ve just got to put aside the overthinking and go for it.
Duplicating websites, pages or putting up locked screens will prevent your messy, mid-edit website being visible to the world while you make your changes. But it’s also fiddly, and extra workload for you.
While I wouldn’t recommend this to an e-commerce powerhouse like Amazon, for many small businesses who manage their own websites on Squarespace, editing the live website is absolutely fine.
This is how I update my own website usually!
The pros and cons of editing your live website fearlessly:
Pros:
Its the quickest and easiest way! No fiddling with duplication or worrying that you’re editing the wrong version, no password protection needed.
No need to transfer across domains or buy a new subscription.
Minimal down time for your existing website, which is the best for your visitors’ user experience.
Cons:
If you make extensive changes to your live website and change your mind, you will have to manually undo all those changes.
As you edit your website might not look 100% polished 100% of the time while you finalise tweaks / optimise the mobile website etc.
Live editing is how I update my website regularly.
It’s also how I usually (but not always) work during a Co-Pilot Website Design day where I spend one day working through my client’s to-do list.
We’re tight on time, and I want the handover to be quick and easy, so editing the live website makes the most sense.
So there you have it, all four ways to make edits to a live Squarespace website.
Each method has it’s pros and cons, and so I hope this blog helps you navigate which method is right for you.
Did you like this blog? Why not share it to Pinterest:
